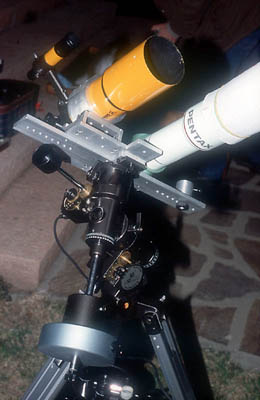
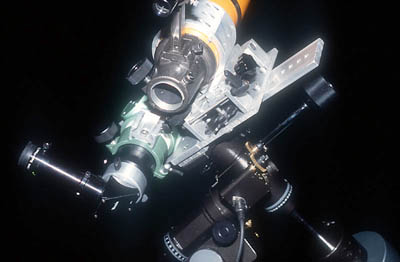
Instruments: Kenko NES mount

Even if this mount is branded Konus, it's identical to the Kenko NES (including the colors of the knobs!). It's motorized in both axes and has an excellent tracking, with a very little periodic error, considering it's compactness and lightness. It can easily track 15 minutes exposures with a 50mm or more without corrections, always giving pin-point stars: this is possible thanks to it's great polar finder. On the mount I've placed a small acromatic refractor (80 mm f/5) and a Pentax 75 apo refractor. The first is used as guide telescope and the second for deep-sky imaging. With an aluminum bar I can put also two cameras, plus one piggybacked on Pentax 75 plus one on the counterweight bar. It's an interesting solution for meteor imaging.
The mount work very well with the ST4, that I use when I take 40 min exposures with a 200 mm lens or Pentax 75 (500 mm).
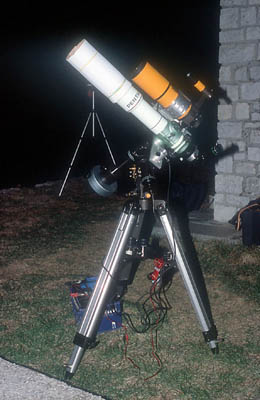

Some views of Kenko Nes with the Pentax 75 apo and the 80mm f/5 refractor. Note the 6 kg counterweight (green): the big overload is well supported by the mount that track very well for deepsky imaging.
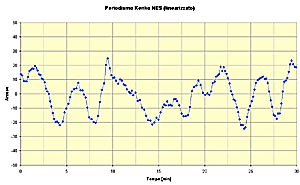

Graph of the periodic error of Kenko NES: it's quite irregular, but the amplitude of the motion is however small for such a small mount, about +/-20". Click for enlarging.


Hints for autoconstruction:
Discaimer
: the reader will assume the risk for all the modifications here propose, moreover the warranty will be void.
  • Autoguider interface, with ST4 standard, to be able to autoguide with any autoguider camera. The modifications are very simple.
    • You'll need:
      • 1 RJ12 6 pin socket ("phone" socket) [the standard phone jack is 2 or 4 pins and is named RJ11, while the 6 pin option is named RJ12]
      • 10 cm of coloured wires
    • Procedure
      • unconnect all the power and motor cables
      • open the front panel, unscrewing the four screws
      • gently extract the electrical cards
      • solder the coloured wires to the buttons using the scheme in the figure bottom-left
      • connect the wires to the RJ12 socket using the order in the figure bottom-right
      • glue the RJ12 socket to the bottom card, under the +X button
      • cut a window on the side of the handbox, using in example a "minidremel" tool
      • put all together again and test with a tester
      • if all is ok, than carefully test with your camera and telescope
Complete view of the modified handbox, with the AR cable (black) and the one to connect the ST4 (grey, "TIC" cable) . The other cables, for the DEC motor and the +12V power supply are not connected. Please note that the power supply connector has the ground in the center, so be aware of not inverting because you can burn the handbox!
To connect any autoguider with RJ12 output, simply use a 6 pin "phone" cable with RJ12 plugs at both sides.
Detail of the handbox with the RJ12 socket on the side.
  .
Comparison between the handbox without and with the front plate. After removing the transparent protective sheet with the "Konus" brand, the "Kenko" writing is visible, revealing the original manufacturer. The "Kenko" writing is also reported on the electronic cards.
The electronic cards with the RJ12 socket glued.
Detail of the buttons and the contacts to be used to connect the autoguider port. The colors of the wires are the same of the RJ12 socket of the figure on the right.
Schematics of the pinout of the RJ12 socket, assuming the SBIG specifications. All connections are N.O. (Normally Open).


HTML Editing and Publishing by Lorenzo Comolli. Email me at comolli@libero.it.
Back to Main Page